HTMLを書こう!
01: Intro
WebページをHTMLとCSSを使って制作していきます!
AIを活用して、オリジナルのWebサイトを作りましょう!
02: ページを作成しよう!
さっそく始めましょう!
今回は Web サイトのひな型を使います。
index.htmlファイルを作成し、以下のコードをコピペしてください 📋️
| <!DOCTYPE html>
<html>
<head>
<!-- ページの設定などを書く -->
<style>
.contents-wrapper {
padding: 50px 150px;
}
</style>
</head>
<body>
<div class="contents-wrapper">
<!-- ページの内容を書く -->
</div>
</body>
</html>
|
!DOCTYPE htmlはこのファイルが HTML ファイルであることを明示しています。
Webページで表示する要素は<html>...</html>などの「タグ」で囲う必要があります!
<div class="contents-wrapper"> ... </div>は、中身のコンテンツを少し中央に寄せるためのもので、今回は時間の都合上ご用意しました。
03: 文字を追加してみよう
早速文字を追加してみましょう!
h1 とは
<h1>...</h1>は見出しです。h1の他にもh2,h3,h4,……があり,数字が小さいほど,目立つようになっています。
つまり,<h1>には一番目立たせたい内容,例えばページのタイトル,章の名前などを書くことがあります。
このようにコードを加筆します!
| <!DOCTYPE html>
<html>
<head>
<!-- ページの設定などを書く -->
<style>
.contents-wrapper {
padding: 50px 150px;
}
</style>
</head>
<body>
<div class="contents-wrapper">
<!-- ページの内容を書く -->
<h1>こんにちは!</h1>
</div>
</body>
</html>
|
p とは
<p>...</p>は段落を表現します。pは段落を意味する"p"aragraphの略です.「Lorem」というちょっと長い文章を p タグの中に入れてみましょう。
レイアウトを確認する際に使えるダミーテキストです。
Lorem, ipsum dolor sit amet consectetur adipisicing elit.
Perspiciatis, illum dolor. Aspernatur magni reiciendis labore totam et
rem, quae voluptates accusantium quas facere sint voluptas cupiditate
maxime nemo inventore numquam?
次のようになります。
| <!DOCTYPE html>
<html>
<head>
<!-- ページの設定などを書く -->
<style>
.contents-wrapper {
padding: 50px 150px;
}
</style>
</head>
<body>
<div class="contents-wrapper">
<!-- ページの内容を書く -->
<h1>こんにちは!</h1>
<p>
Lorem, ipsum dolor sit amet consectetur adipisicing elit. Perspiciatis,
illum dolor. Aspernatur magni reiciendis labore totam et rem, quae
voluptates accusantium quas facere sint voluptas cupiditate maxime nemo
inventore numquam?
</p>
</div>
</body>
</html>
|
04: リンク・画像を追加しよう
リンク・画像を追加しましょう!
リンクを追加
リンクを追加する際は<a href="...."> ... </a>を利用します。hrefのあとにリンク先の URL を書くと,クリックしたときにページ遷移させることができます。
| <!DOCTYPE html>
<html>
<head>
<!-- ページの設定などを書く -->
<style>
.contents-wrapper {
padding: 50px 150px;
}
</style>
</head>
<body>
<div class="contents-wrapper">
<!-- ページの内容を書く -->
<h1>こんにちは!</h1>
<p>
Lorem, ipsum dolor sit amet consectetur adipisicing elit. Perspiciatis,
illum dolor. Aspernatur magni reiciendis labore totam et rem, quae
voluptates accusantium quas facere sint voluptas cupiditate maxime nemo
inventore numquam?
</p>
<a href="https://x.com/japan">私のXプロフィールへ</a>
</div>
</body>
</html>
|
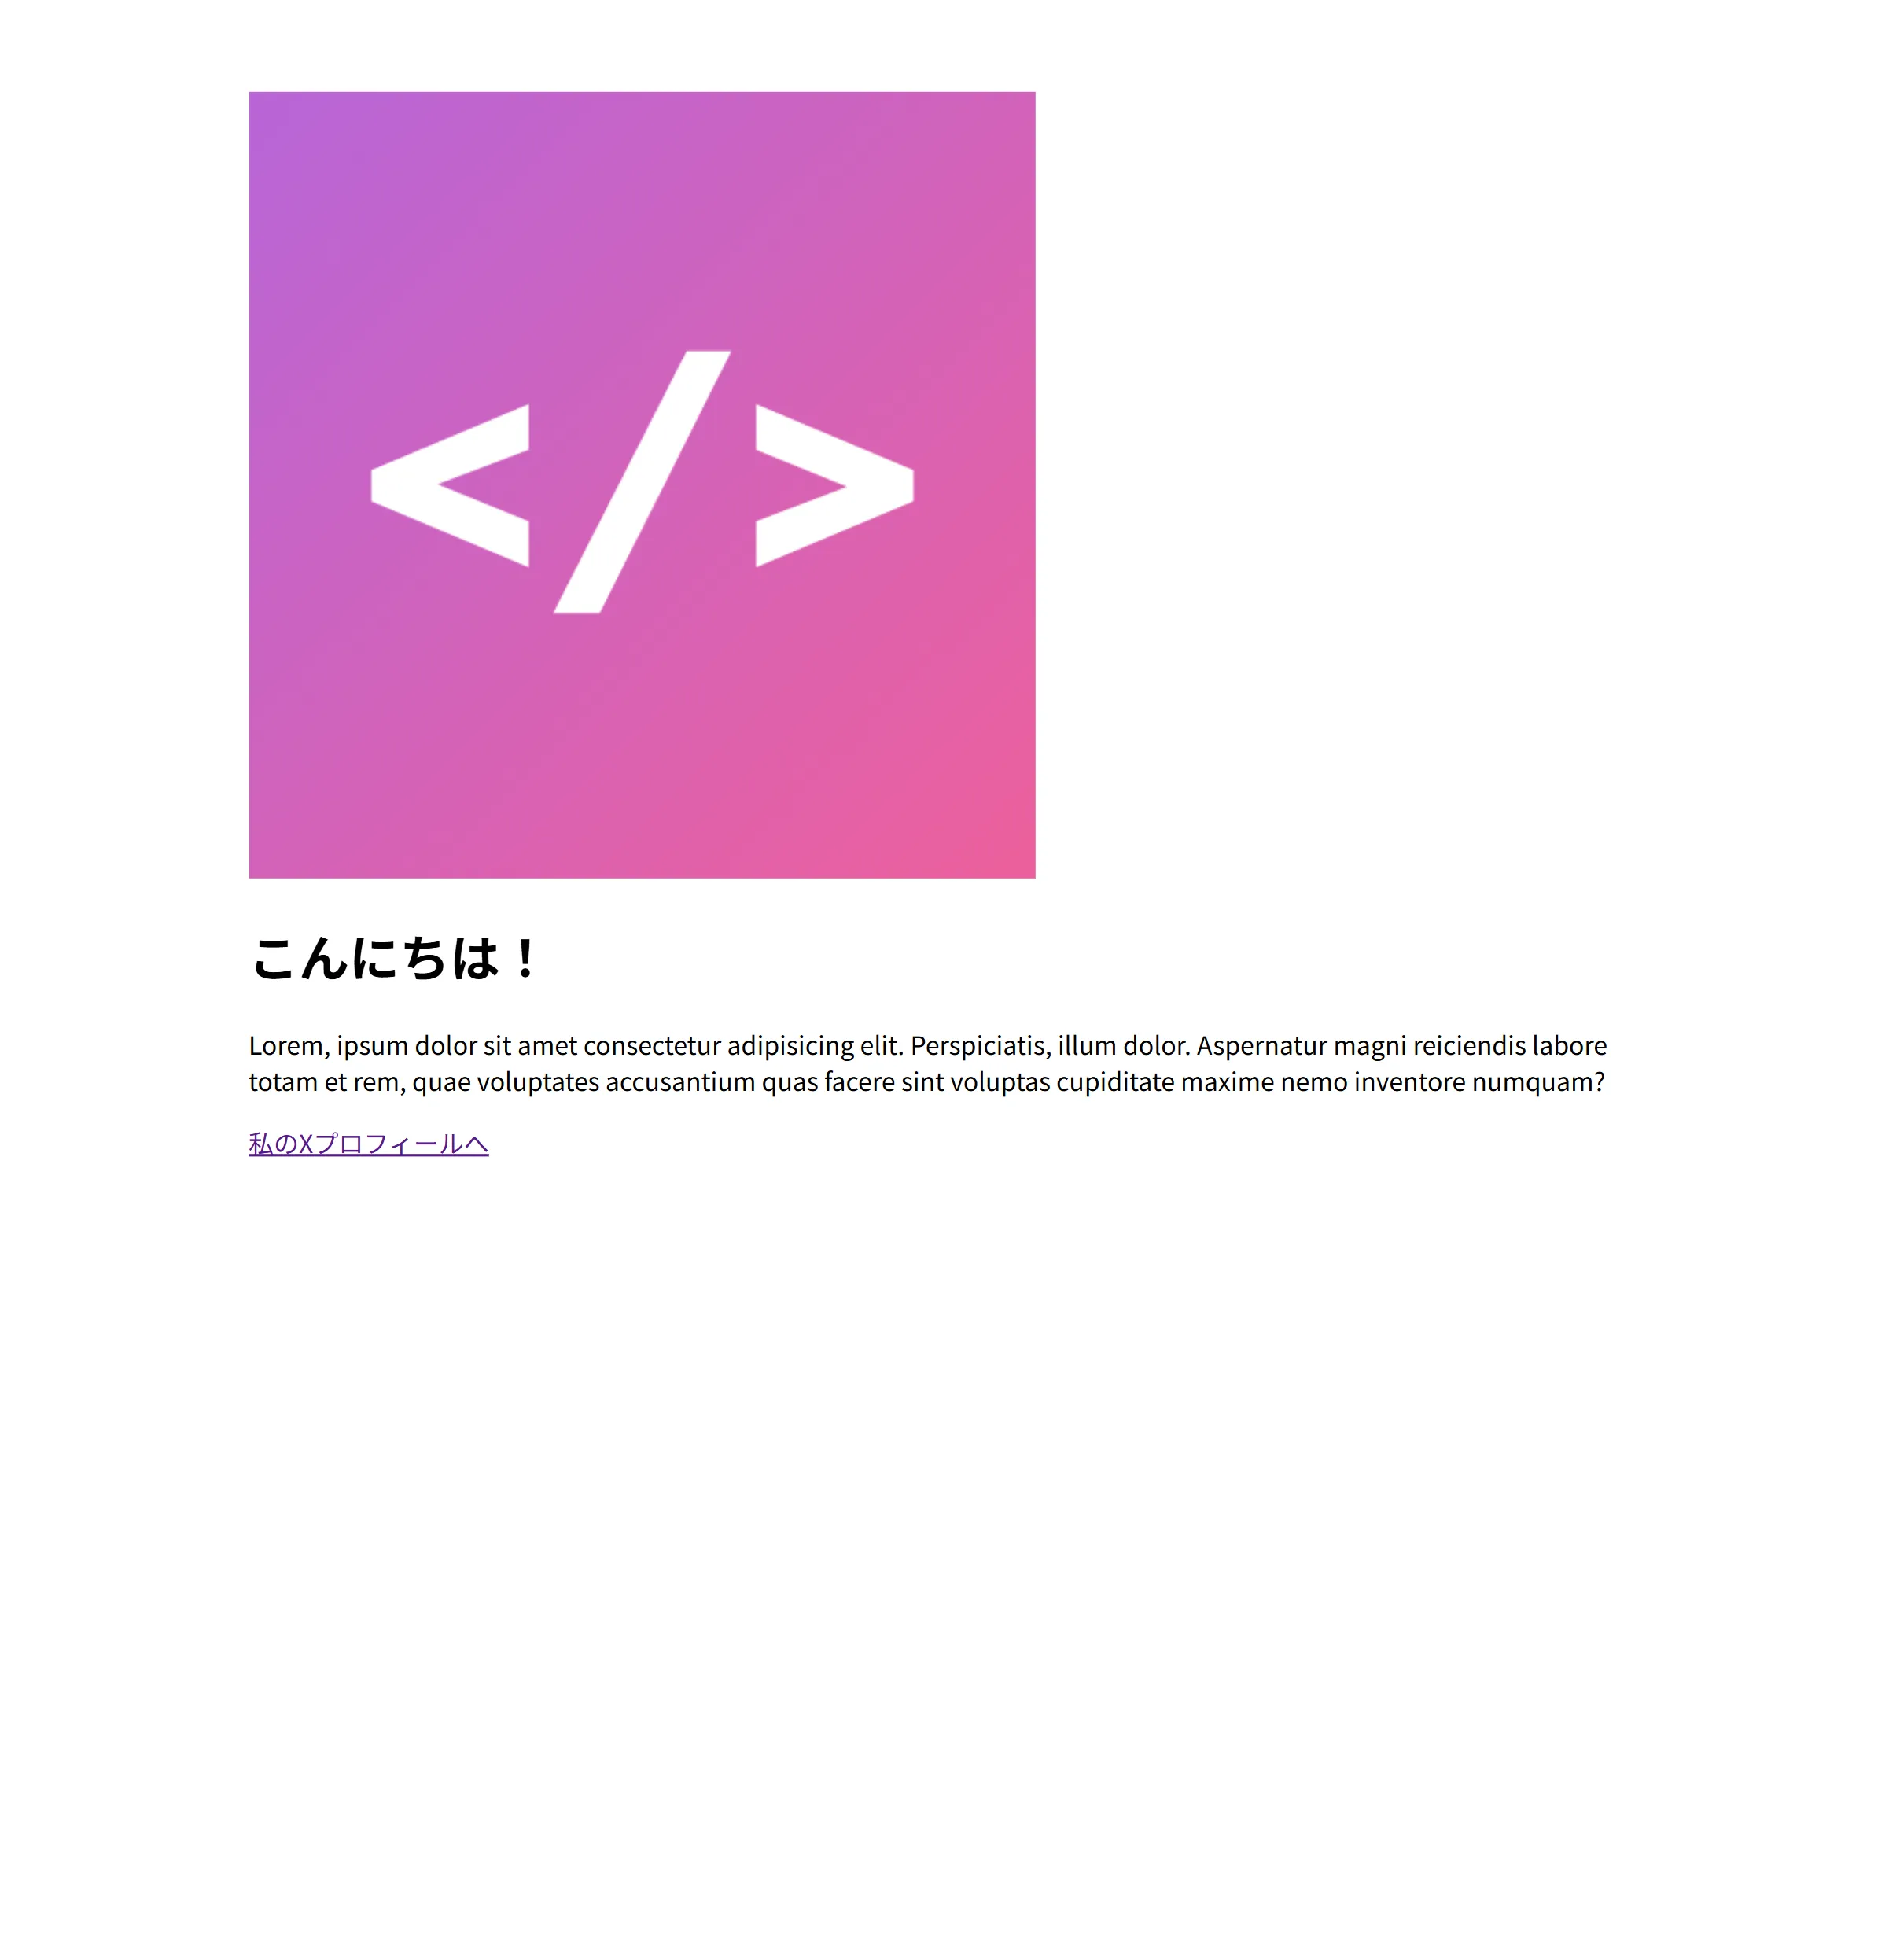
画像を追加
このドキュメントで使用している画像はこちら→https://raw.githubusercontent.com/KanadeSisido/welcome-gdgoc-2025/refs/heads/main/images/logo-mark.png
※右クリックで保存をすることができます。index.htmlと同じ場所に置いてください。
画像を追加する際は<img src="....">を利用します。
imgのあとに画像の名前(場所)を書くと,画像を表示できます。
| <!DOCTYPE html>
<html>
<head>
<!-- ページの設定などを書く -->
<style>
.contents-wrapper {
padding: 50px 150px;
}
</style>
</head>
<body>
<div class="contents-wrapper">
<!-- ページの内容を書く -->
<img src="logo-mark.png" />
<h1>こんにちは!</h1>
<p>
Lorem, ipsum dolor sit amet consectetur adipisicing elit. Perspiciatis,
illum dolor. Aspernatur magni reiciendis labore totam et rem, quae
voluptates accusantium quas facere sint voluptas cupiditate maxime nemo
inventore numquam?
</p>
<a href="https://x.com/japan">私のXプロフィールへ</a>
</div>
</body>
</html>
|
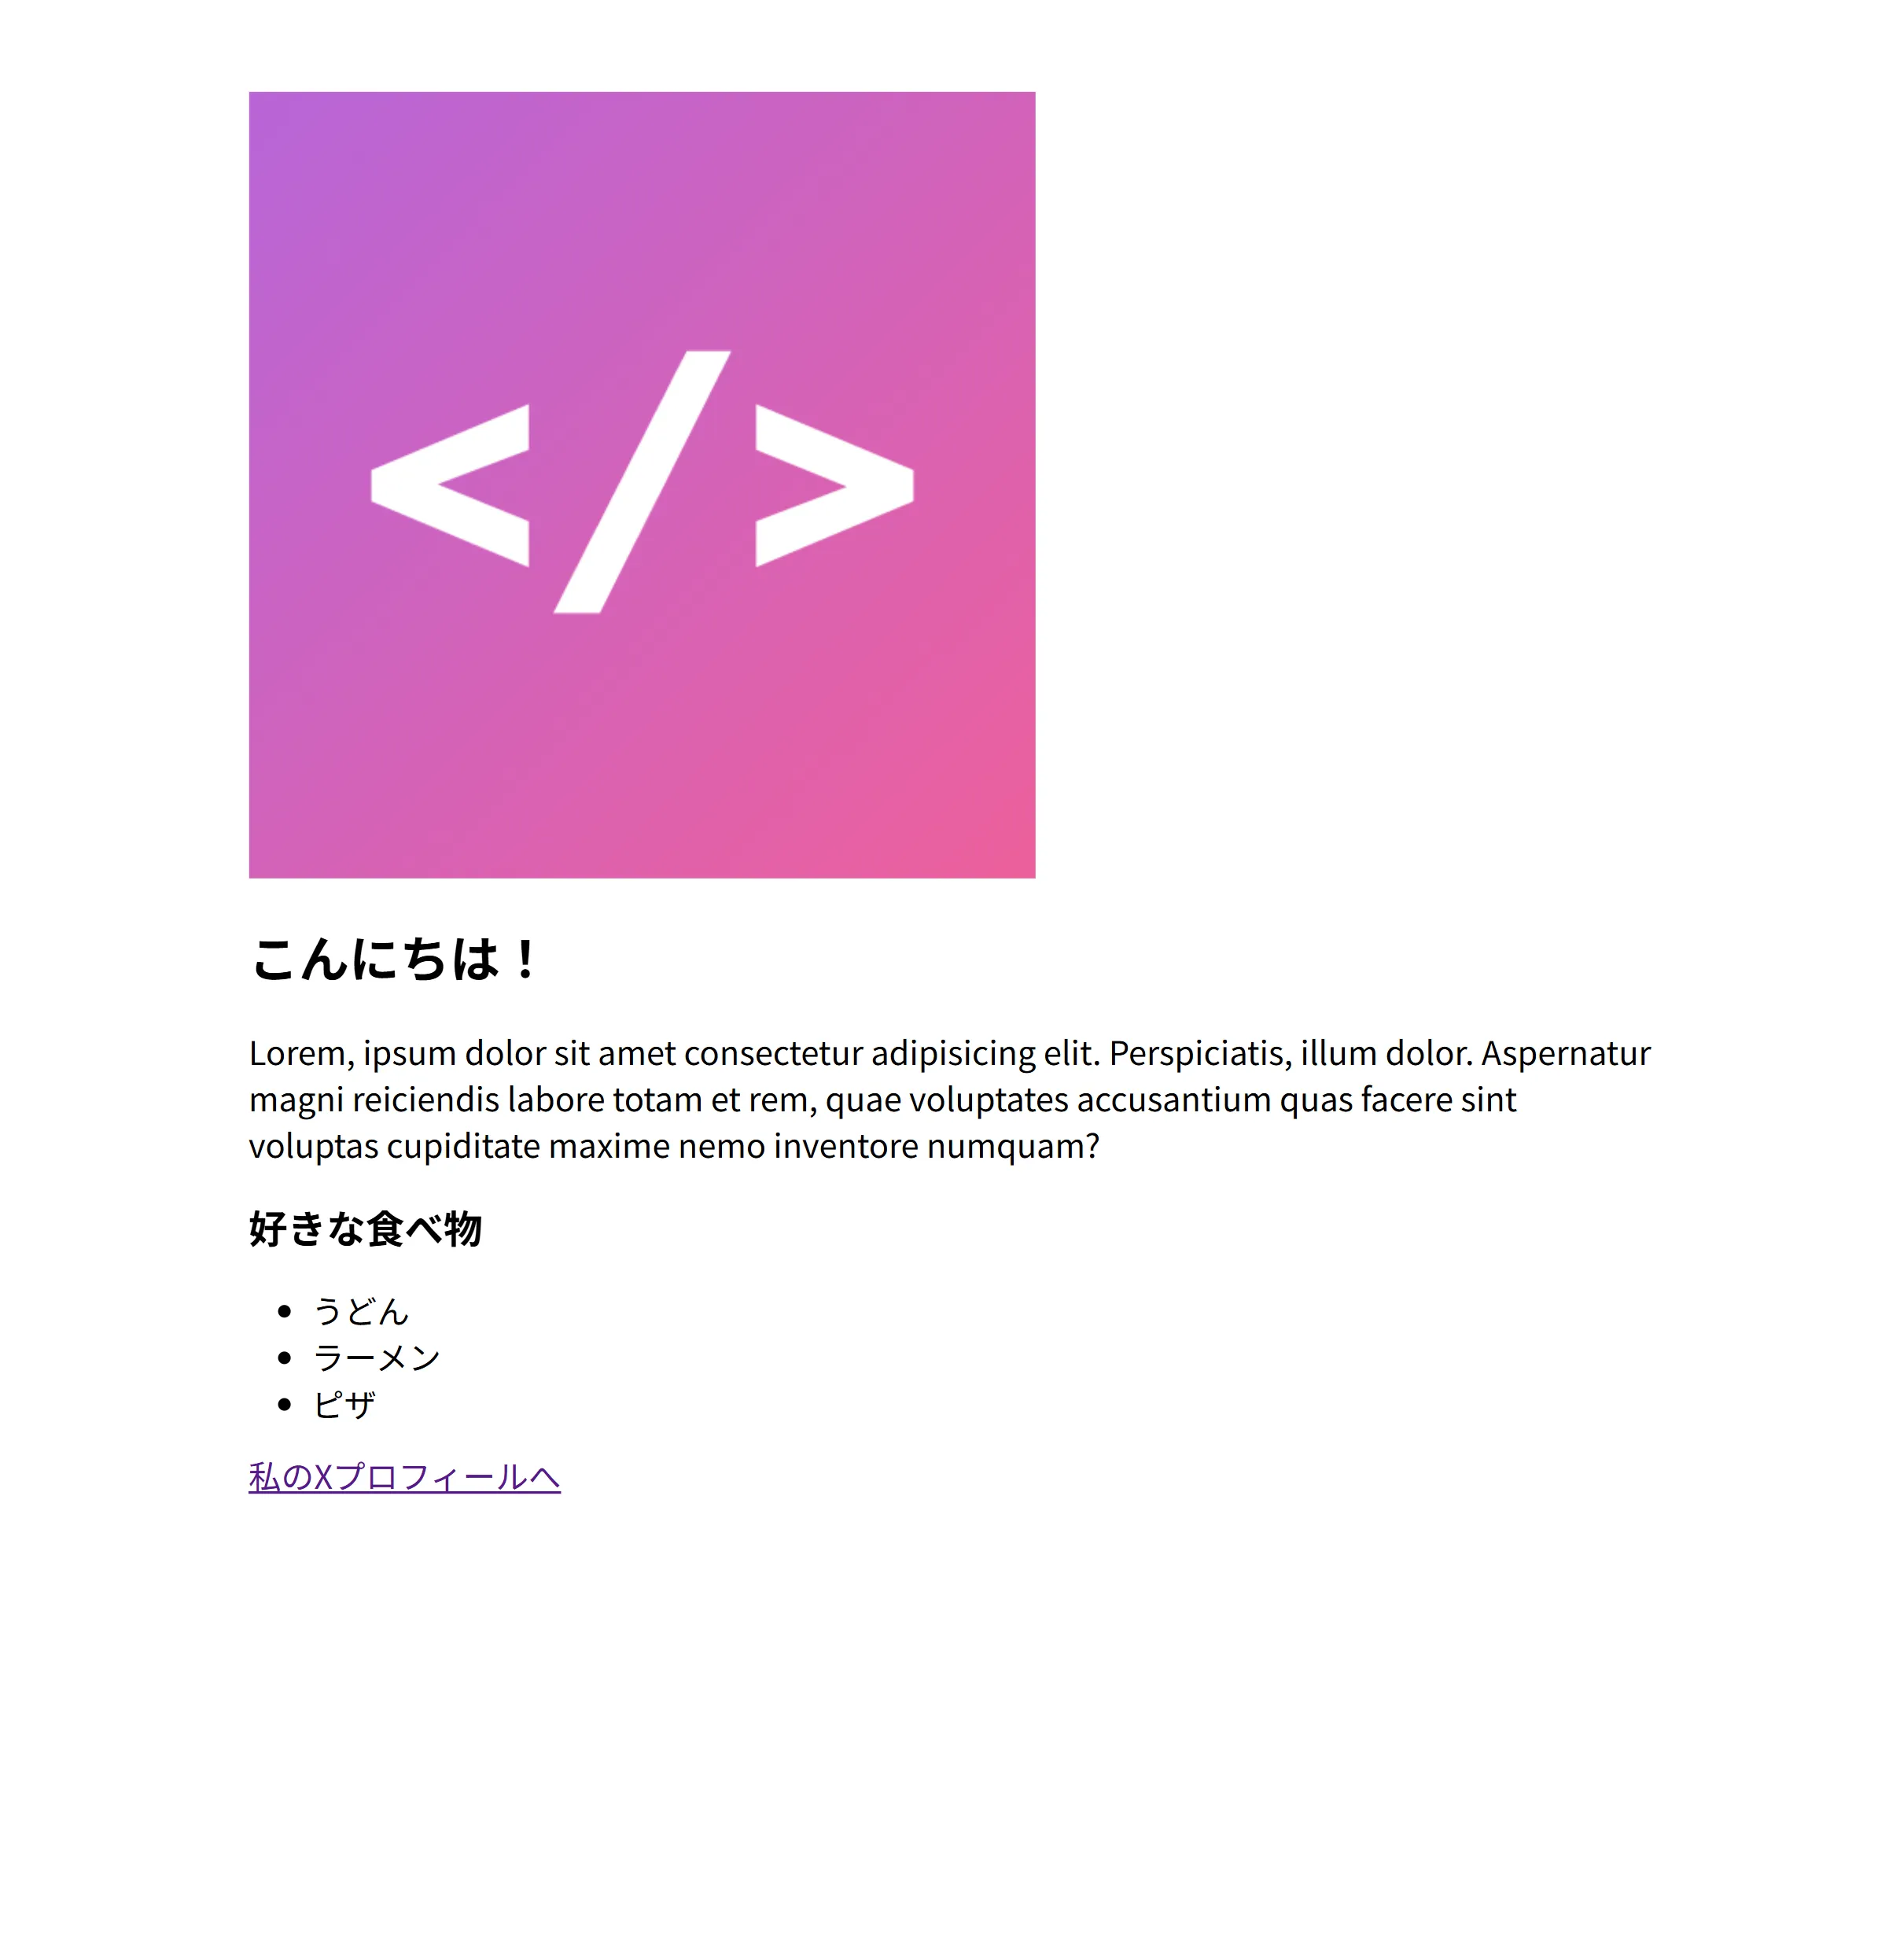
05: リストを作成してみよう
次に,自分の好きなものや,情報を列挙できるリストを作成してみましょう。HTML でリストを作る際には<ul>...</ul>と<li>...</li>を使います。
以下のコードをpタグの下に追記します。
<h2>好きな食べ物</h2>
<ul>
    <li>うどん</li>
    <li>ラーメン</li>
    <li>ピザ</li>
</ul>
こんな感じに追加します。
| <!DOCTYPE html>
<html>
<head>
<!-- ページの設定などを書く -->
<style>
.contents-wrapper {
padding: 50px 150px;
}
</style>
</head>
<body>
<div class="contents-wrapper">
<!-- ページの内容を書く -->
<img src="logo-mark.png" />
<h1>こんにちは!</h1>
<p>
Lorem, ipsum dolor sit amet consectetur adipisicing elit. Perspiciatis,
illum dolor. Aspernatur magni reiciendis labore totam et rem, quae
voluptates accusantium quas facere sint voluptas cupiditate maxime nemo
inventore numquam?
</p>
<h2>好きな食べ物</h2>
<ul>
<li>うどん</li>
<li>ラーメン</li>
<li>ピザ</li>
</ul>
<a href="https://x.com/japan">私のXプロフィールへ</a>
</div>
</body>
</html>
|